
 How can we help you today?
This guide shows you how to connect your MyRepChat account to Sharp Archive. Once connected, Sharp Archive will automatically save a copy of your MyRepChat text messages, so they are archived and ready for review. It also shows how to mute, hide or disconnect the channel later.
You will move between two websites during setup:
- Sharp Archive – where you start and finish the connection.
- MyRepChat – where you create the two keys that Sharp Archive needs.
Before you start: Please have these ready:
- Your Sharp Archive login.
- Your MyRepChat login.
- The mobile number linked to your MyRepChat account.
TIP: Open Sharp Archive and MyRepChat in two separate browser tabs. This makes it easy to copy your keys from one and paste them into the other.
Part 1: Start in Sharp Archive
First, tell Sharp Archive that you want to add a MyRepChat channel.
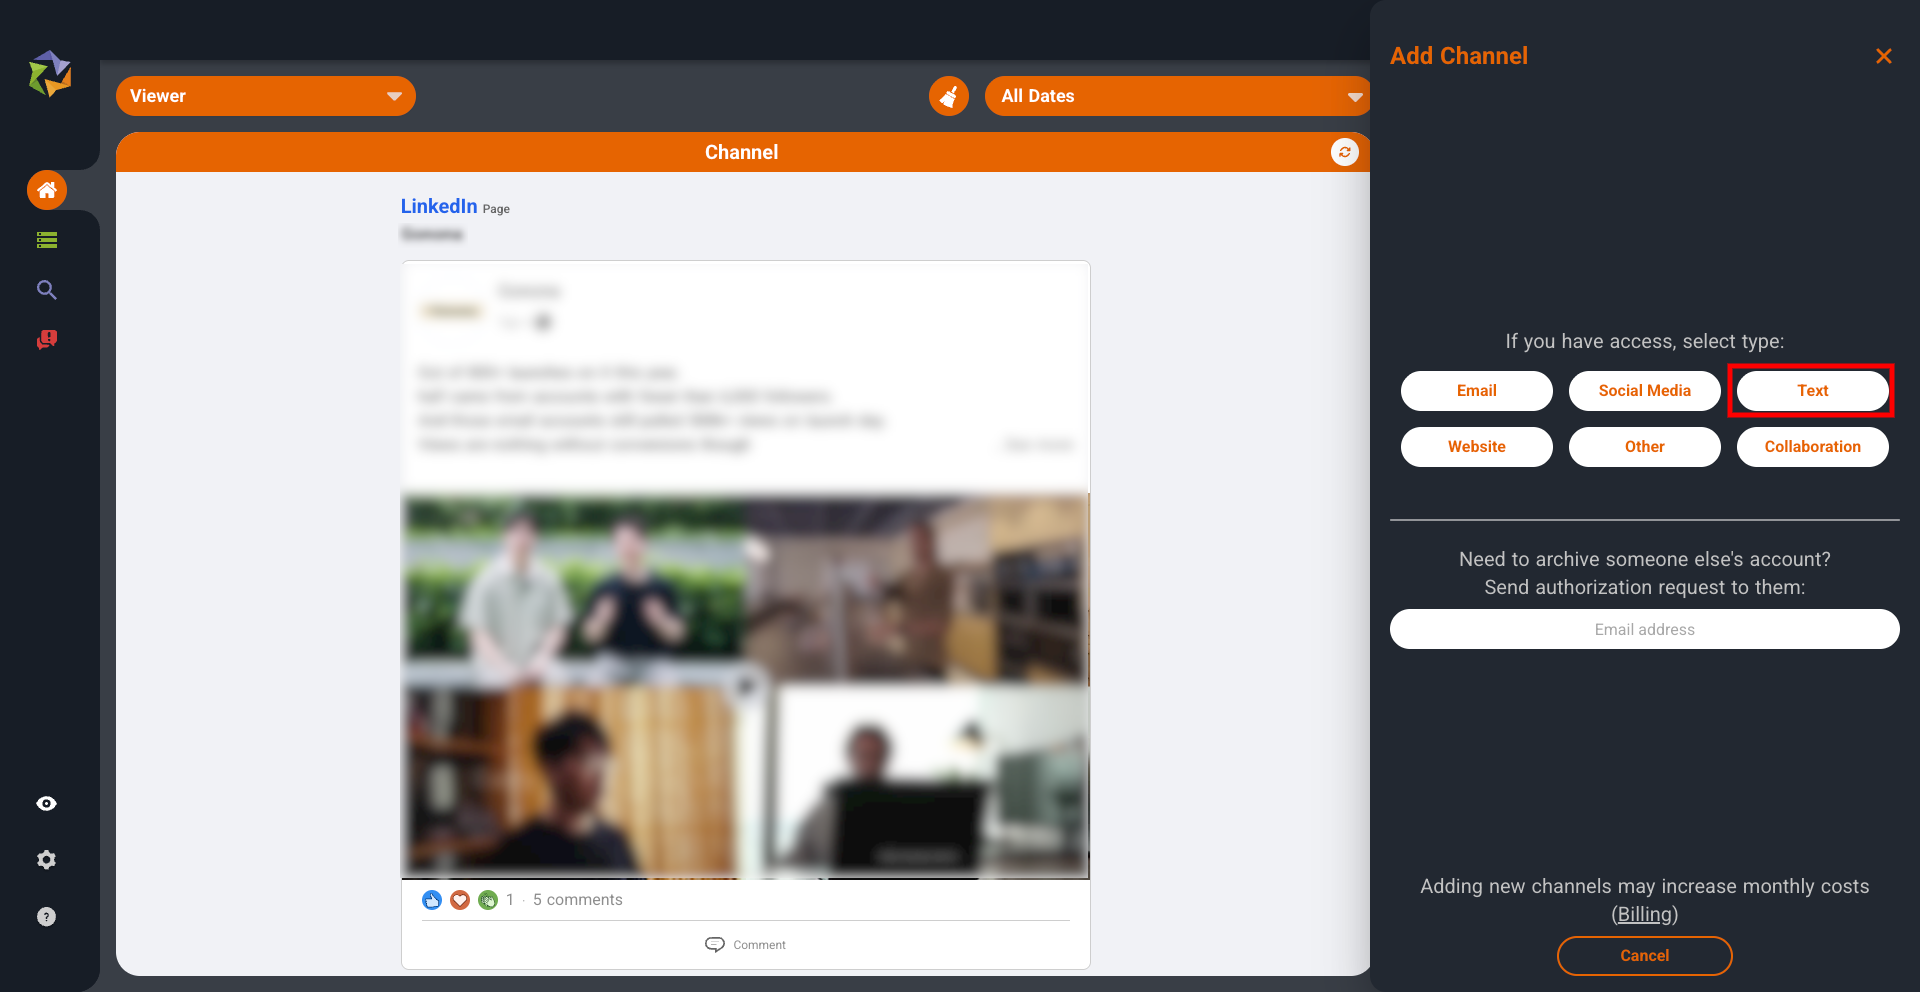
Open Add Channel and choose Text
- Log in to your Sharp Archive account and open the Add Channel panel.
- Under If you have access, select type, click Text.
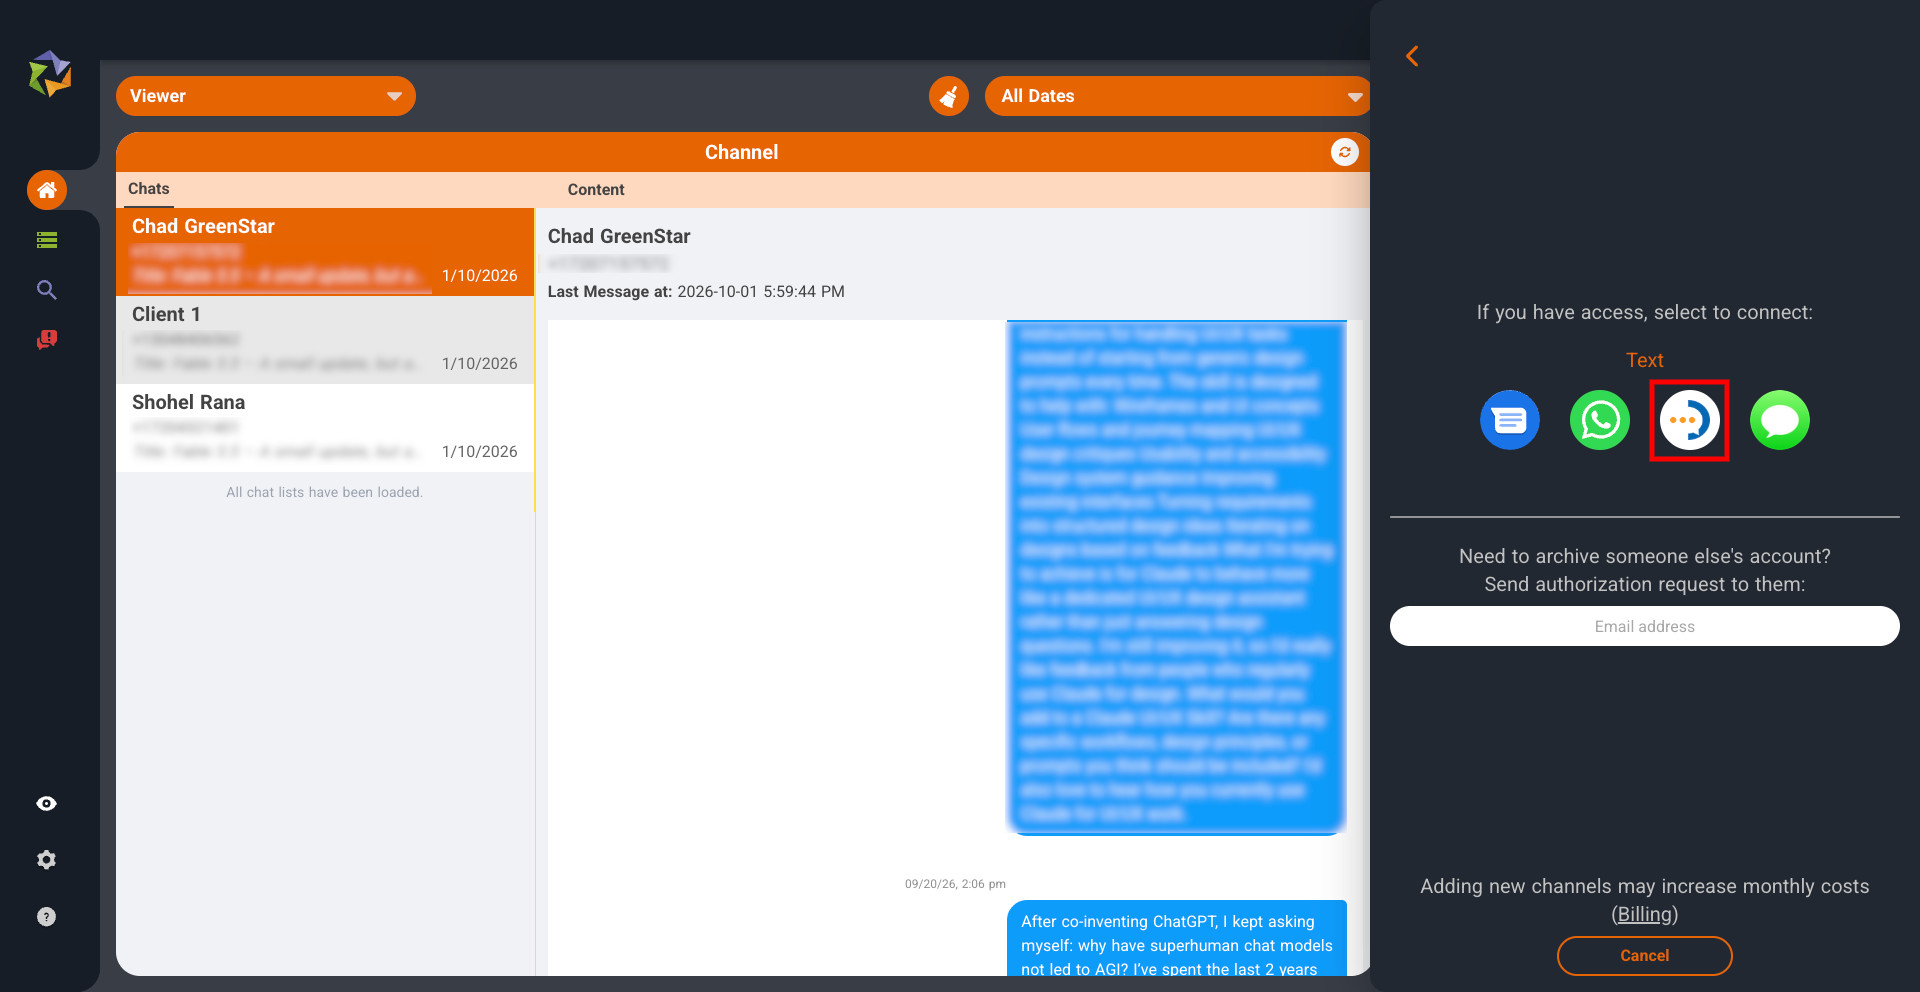
Select MyRepChat
- Under If you have access, select to connect, click the MyRepChat icon. It is the white circle with the blue curve and three orange dots.
Keep the connection form open
- A form appears asking for your Mobile Number, Public Key, and Secret Key.
- You don’t have these keys yet, so leave this tab open and continue to Part 2.
Part 2: Get your API keys from MyRepChat
Next, create the Public Key and Secret Key that let Sharp Archive connect to your account.
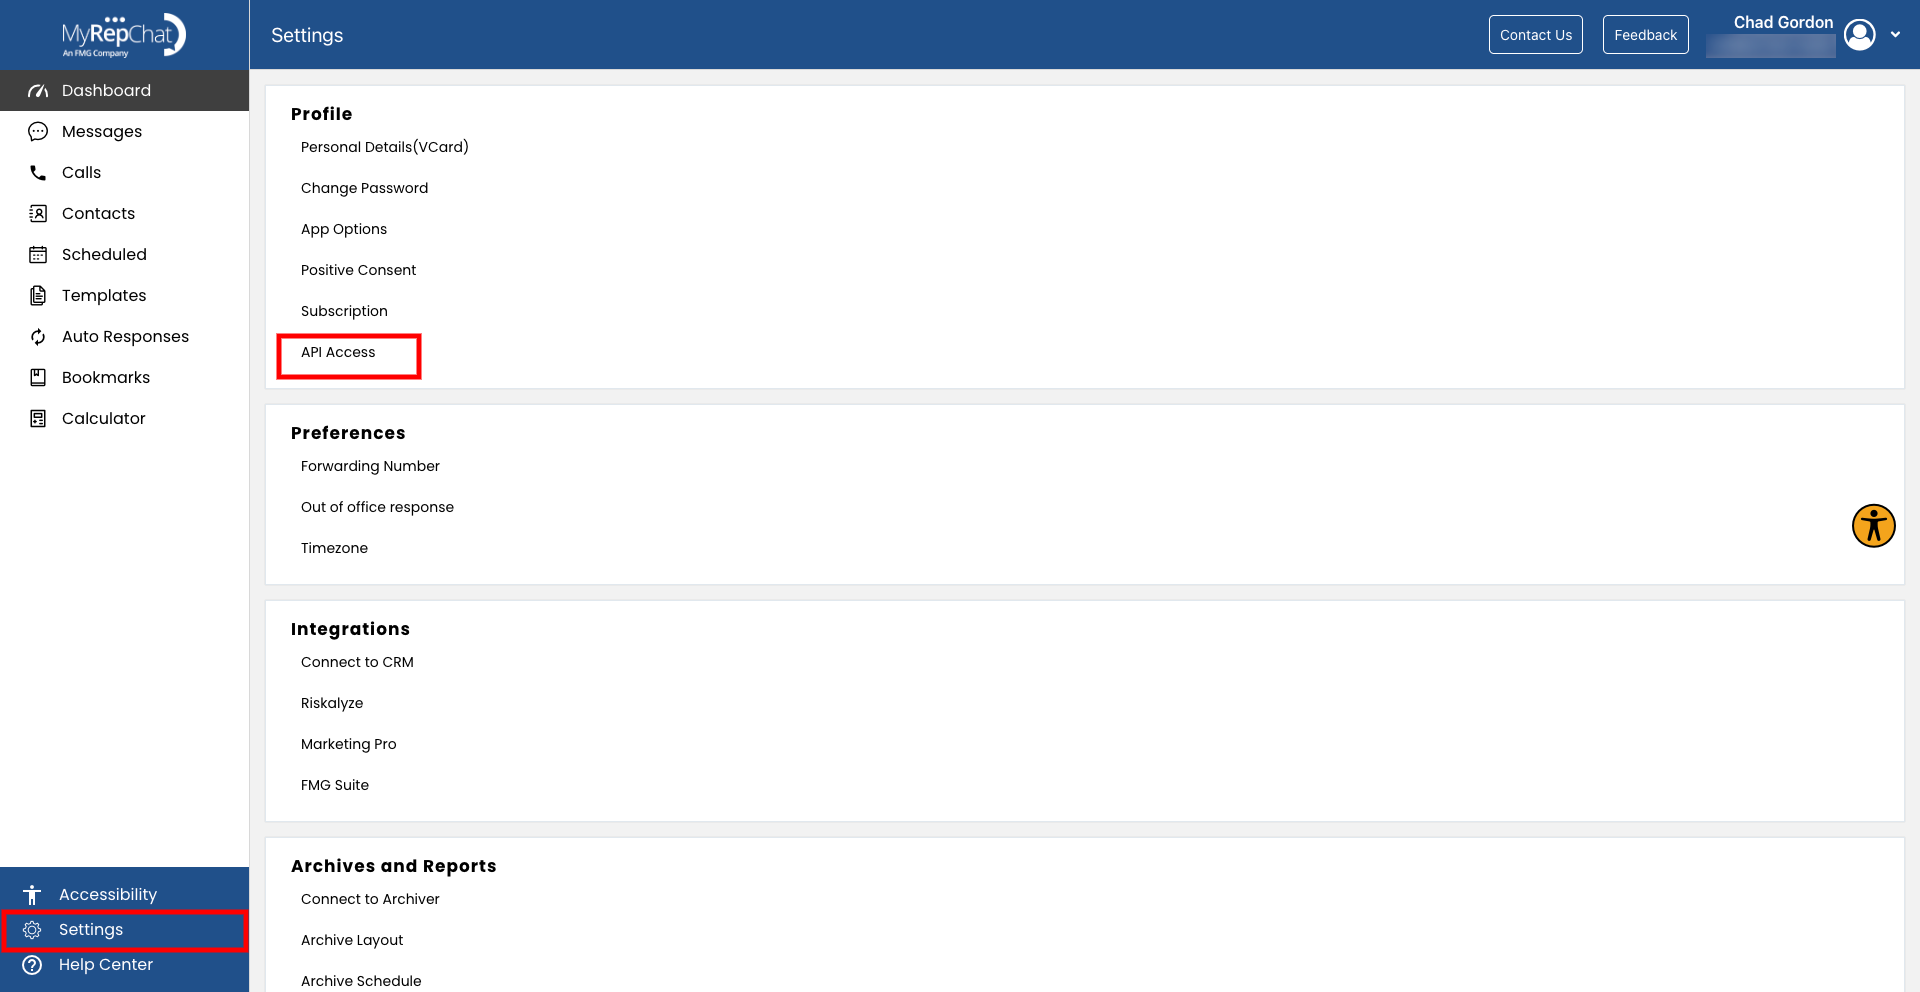
Open Settings, then API Access
- In a new tab, log in to MyRepChat.
- Click Settings at the bottom of the left-side menu.
- Under Profile, click API Access.
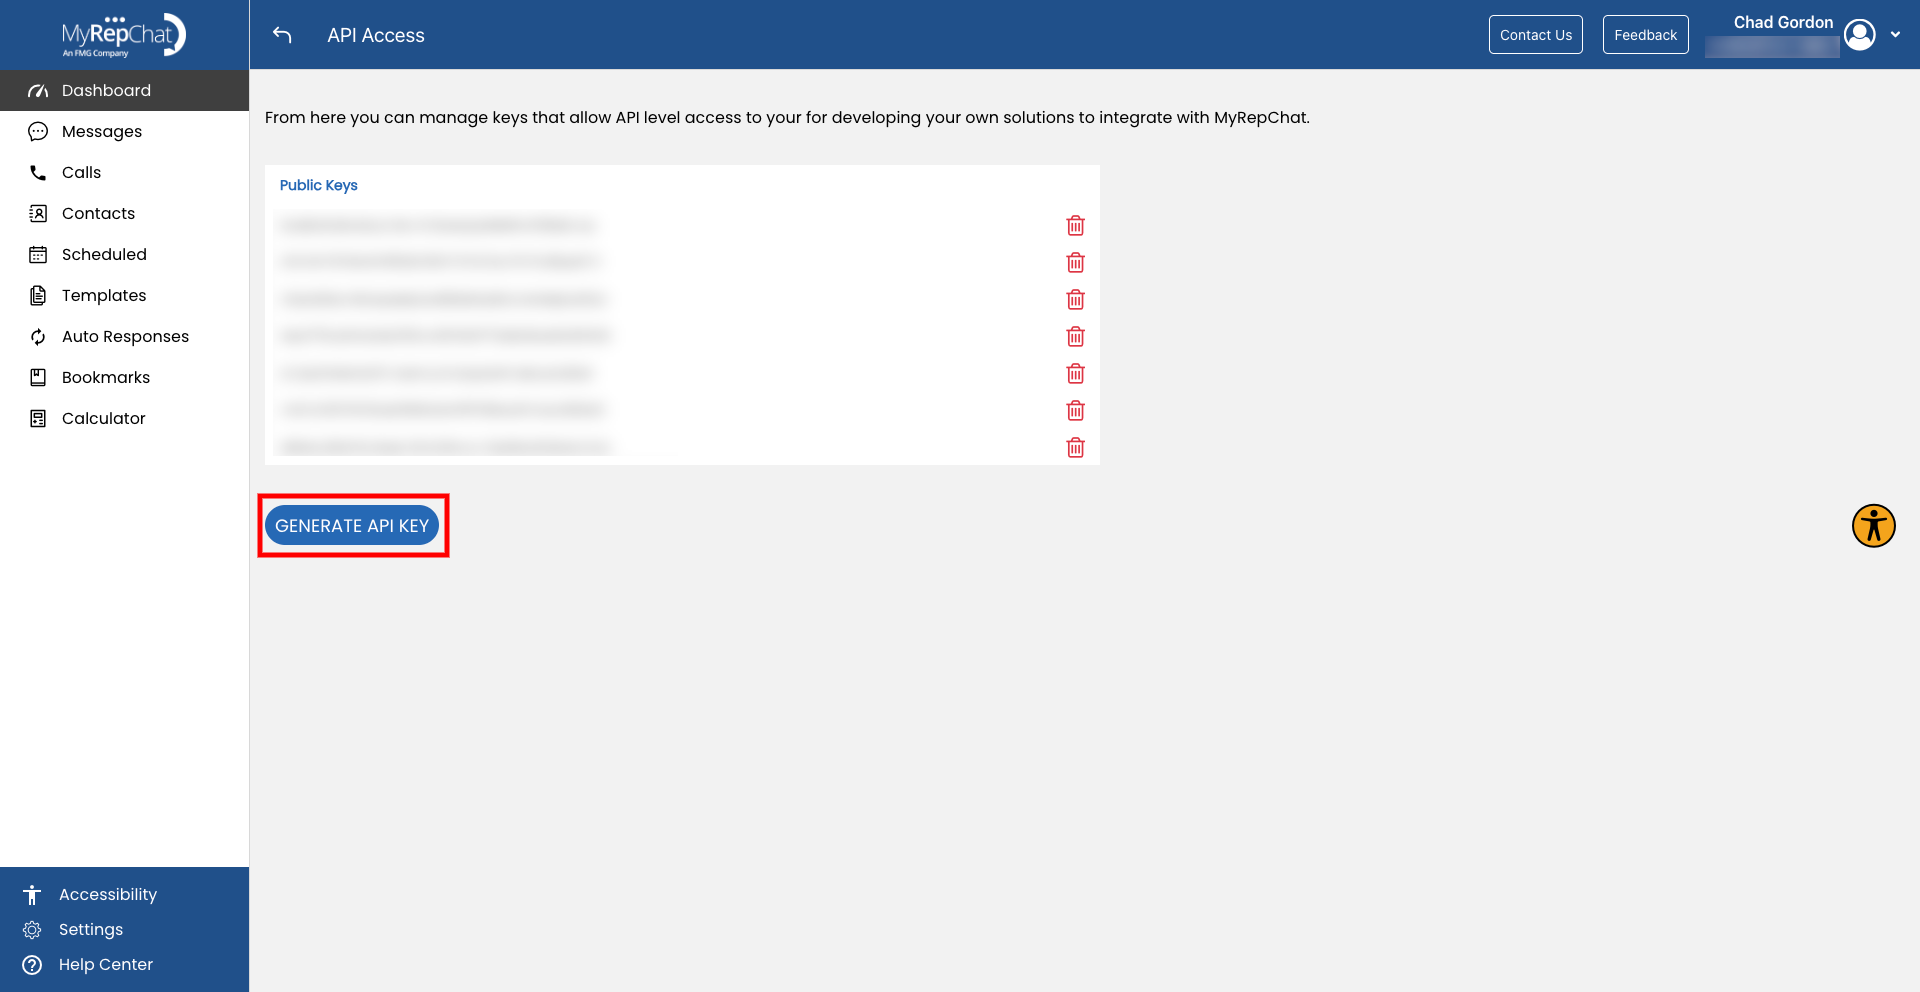
Click GENERATE API KEY
- On the API Access page, click the blue GENERATE API KEY button.
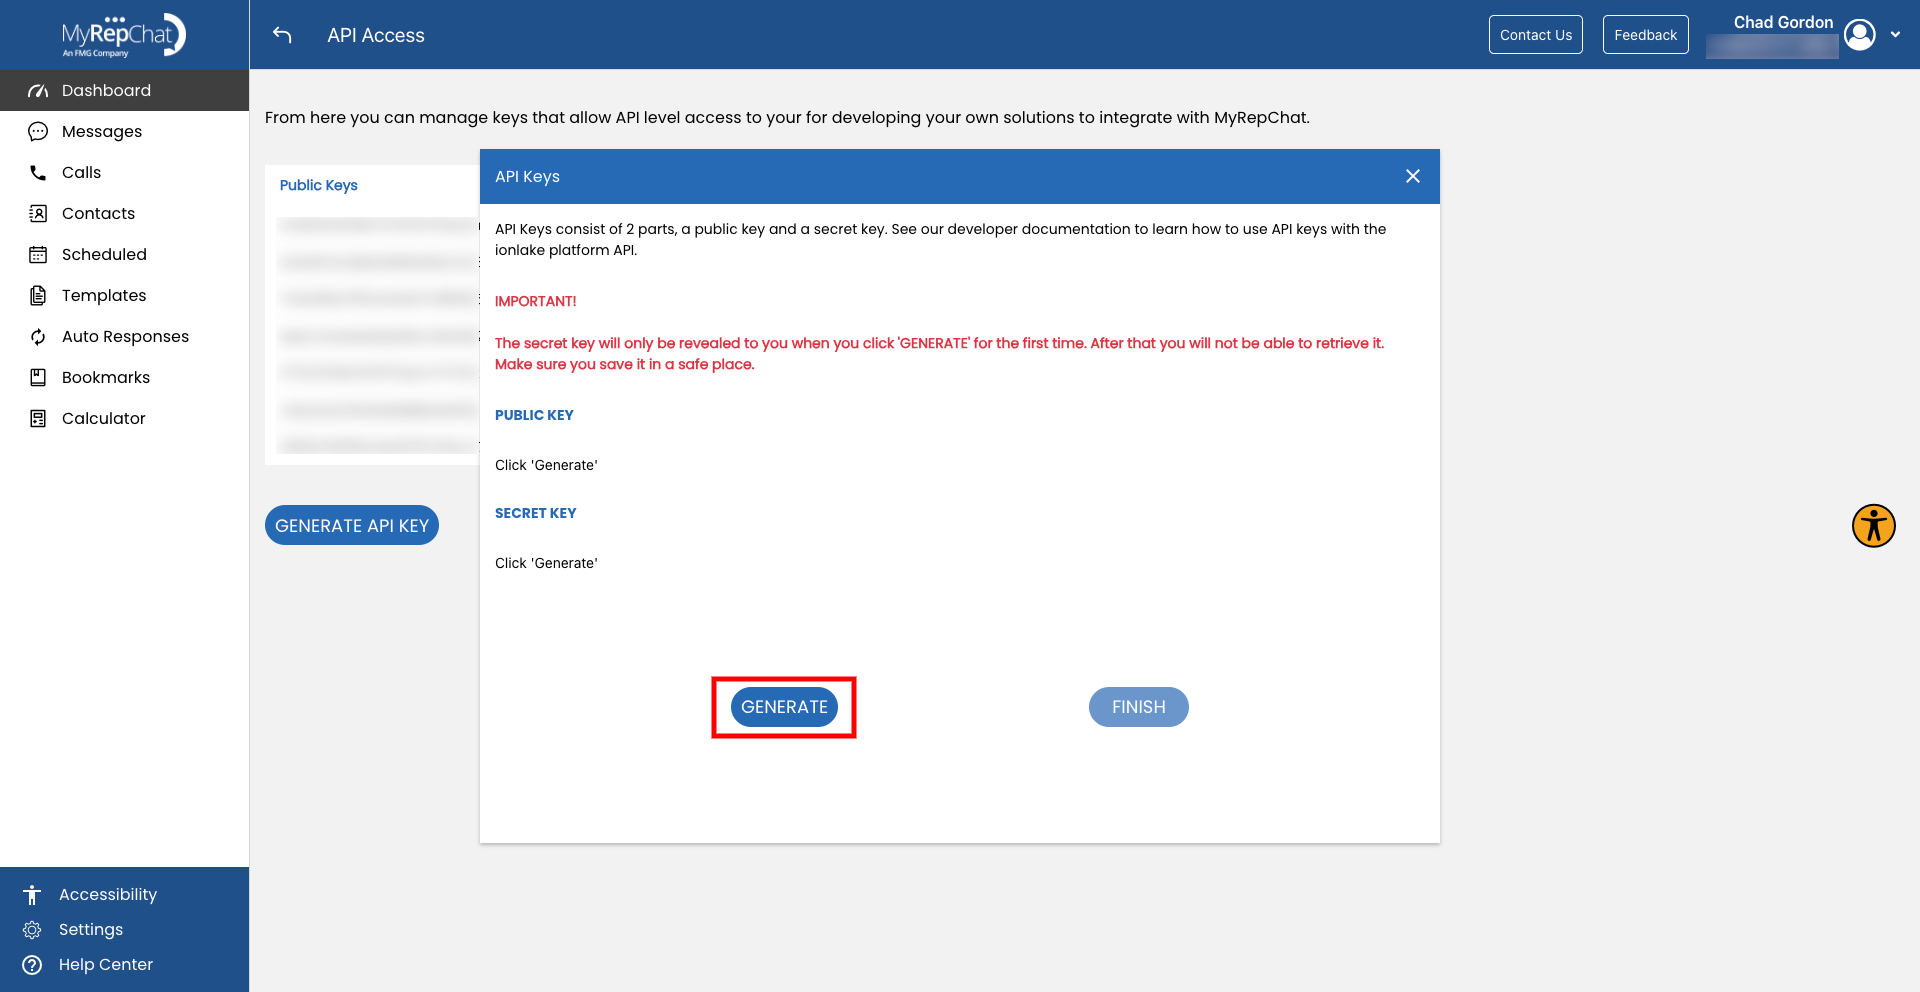
Click GENERATE in the pop-up window
- An API Keys window opens. Click GENERATE.
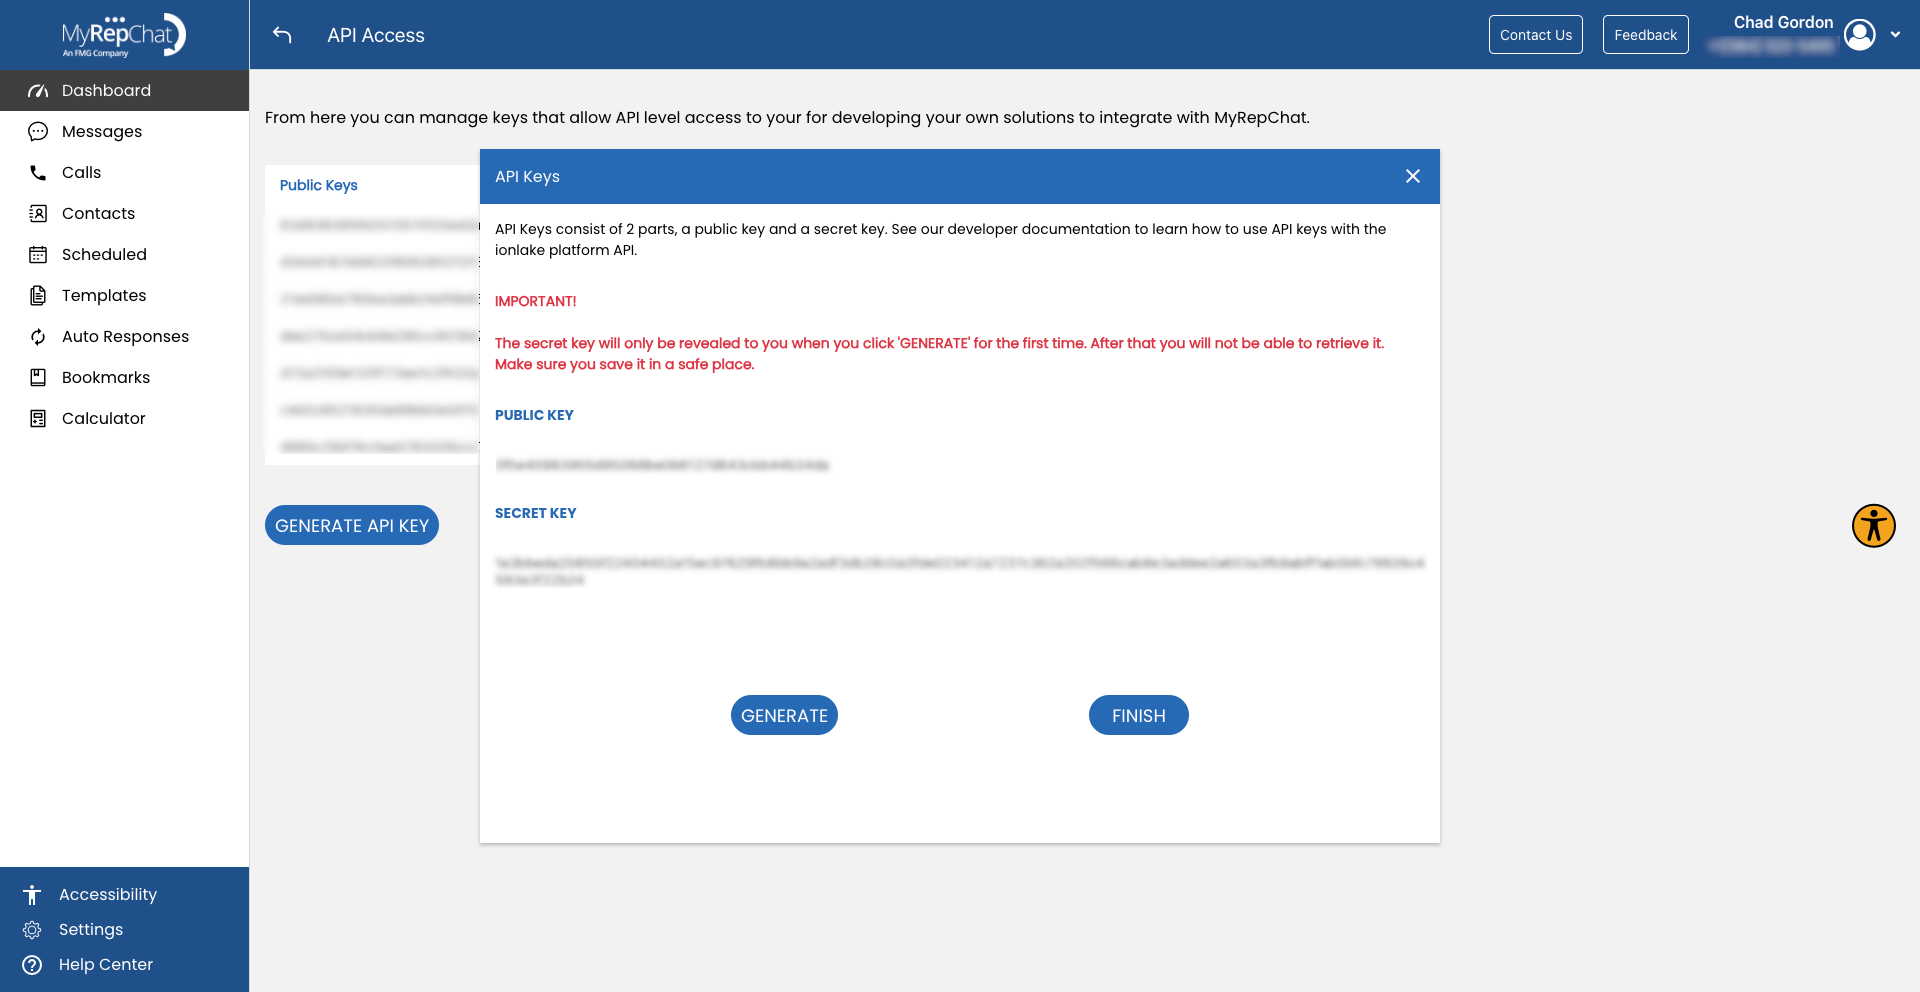
Copy both keys
- Your new Public Key and Secret Key now appear in the window.
- Copy both and keep them somewhere safe for the next step.
- When you have copied them, click FINISH.
IMPORTANT: The Secret Key is shown only once. Copy it before you click FINISH or close the window. If you lose it, you will need to generate a new pair of keys.
Part 3: Finish in Sharp Archive
Finally, paste your keys into Sharp Archive to complete the connection.
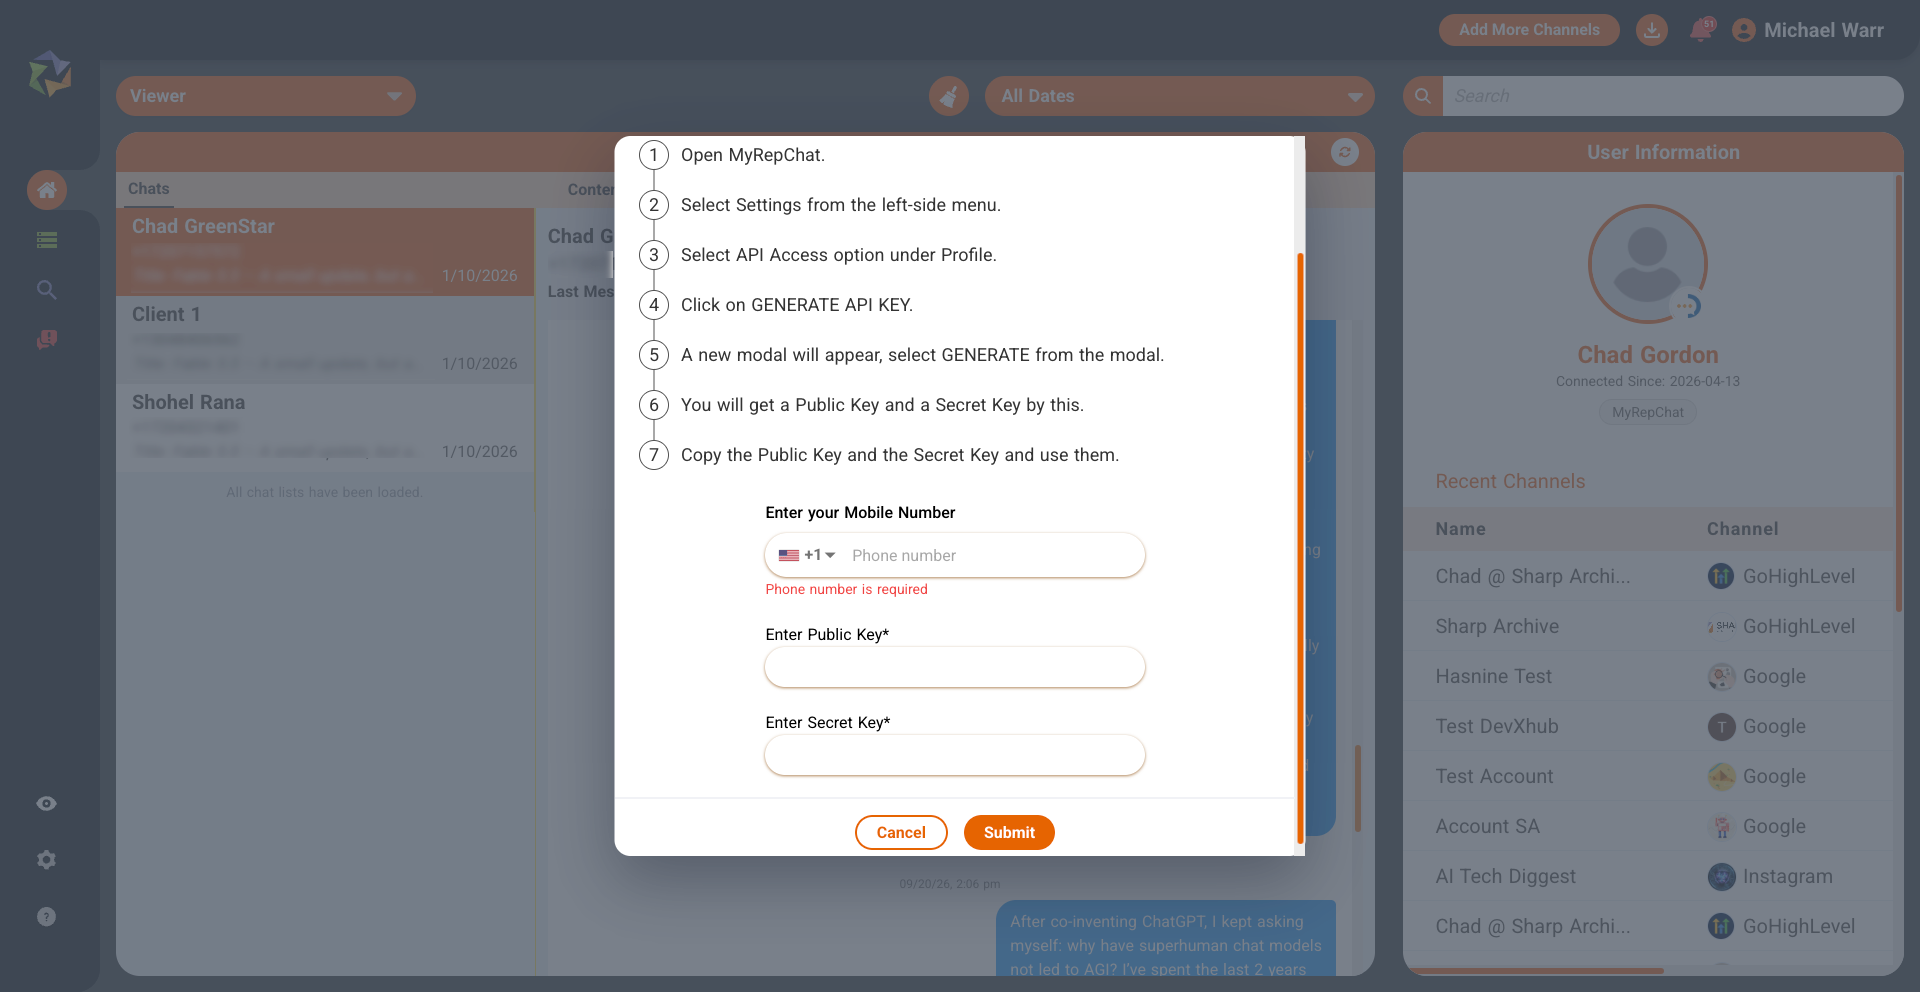
Fill in the connection form
- Go back to the Sharp Archive tab where the MyRepChat form is still open, and fill in the three fields:
- Enter your Mobile Number: Choose your country code (for example, +1 for the US) and type your MyRepChat mobile number.
- Enter Public Key: Paste the Public Key from MyRepChat.
- Enter Secret Key: Paste the Secret Key from MyRepChat.
Click Submit
- Click Submit.
- That’s it! MyRepChat is now connected, and your text conversations will start to appear in Sharp Archive.
DONE: Your MyRepChat messages will now be archived in Sharp Archive automatically. You don’t need to repeat these steps unless you delete the keys or the connection.
Part 4: Mute, Hide or Disconnect MyRepChat
Use these steps later if you need to change how Sharp Archive handles your MyRepChat channel.
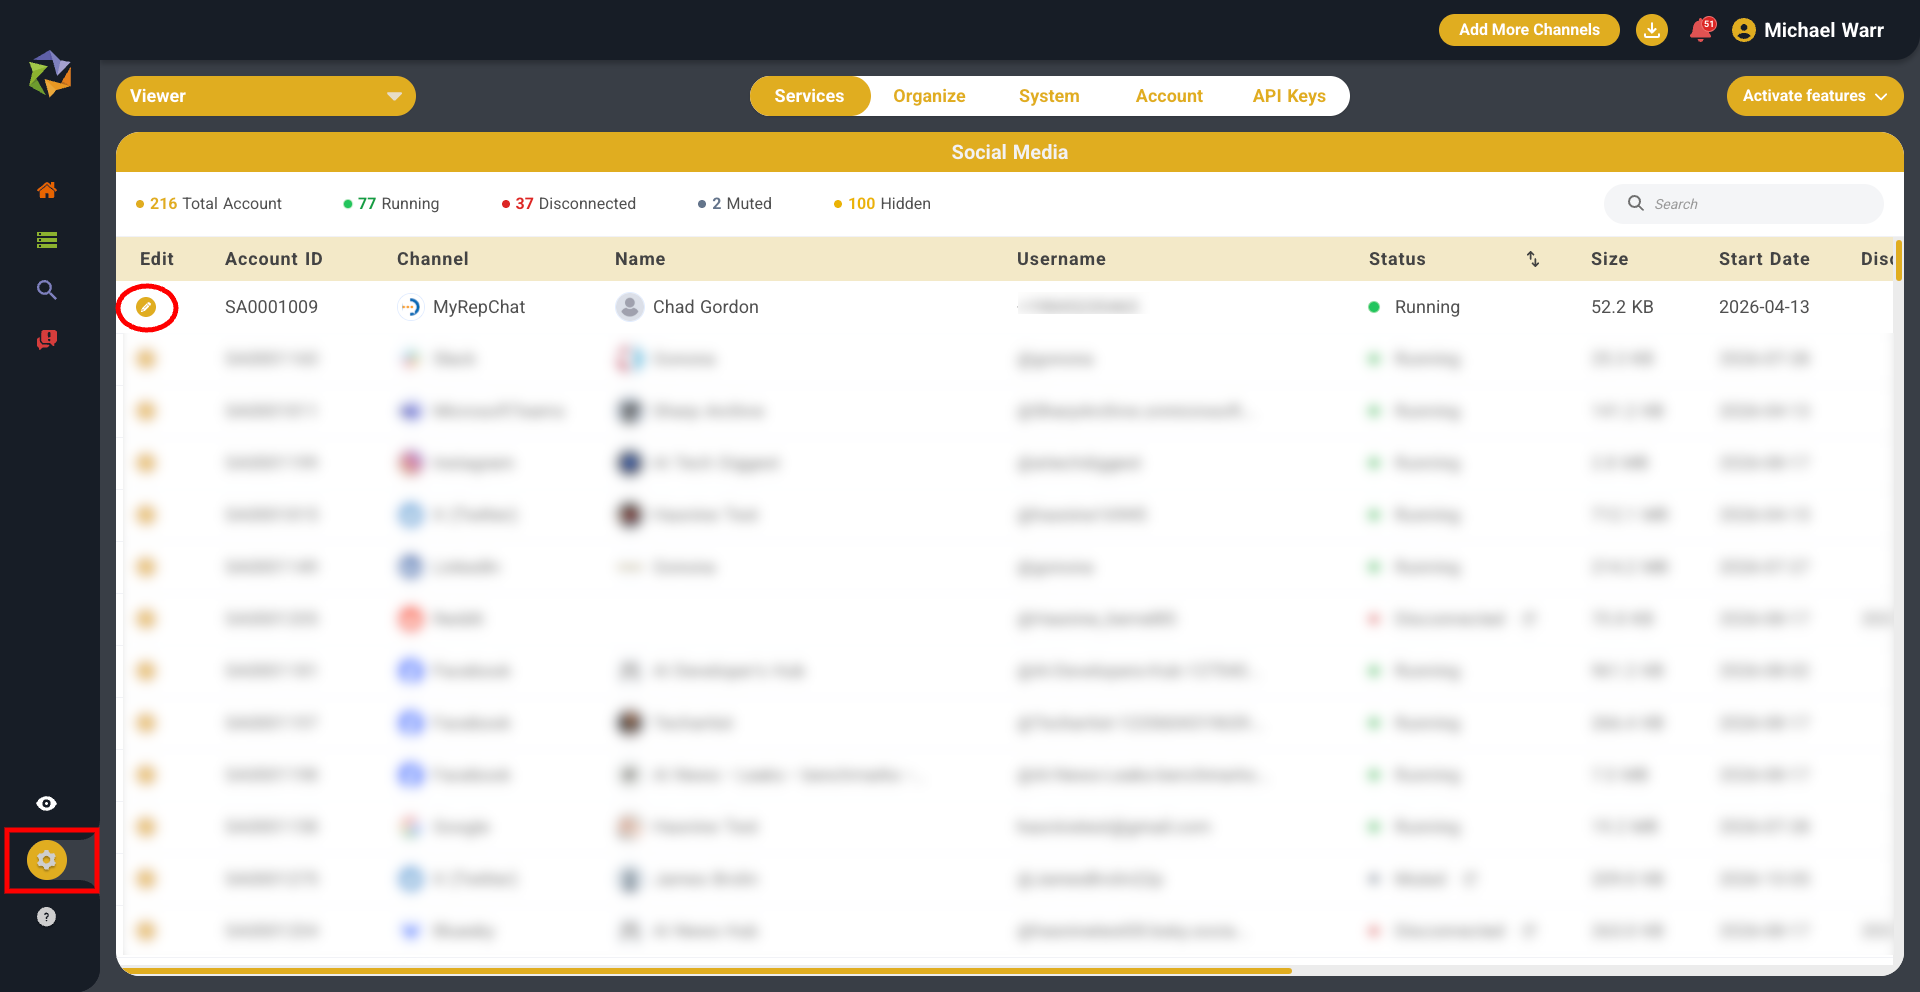
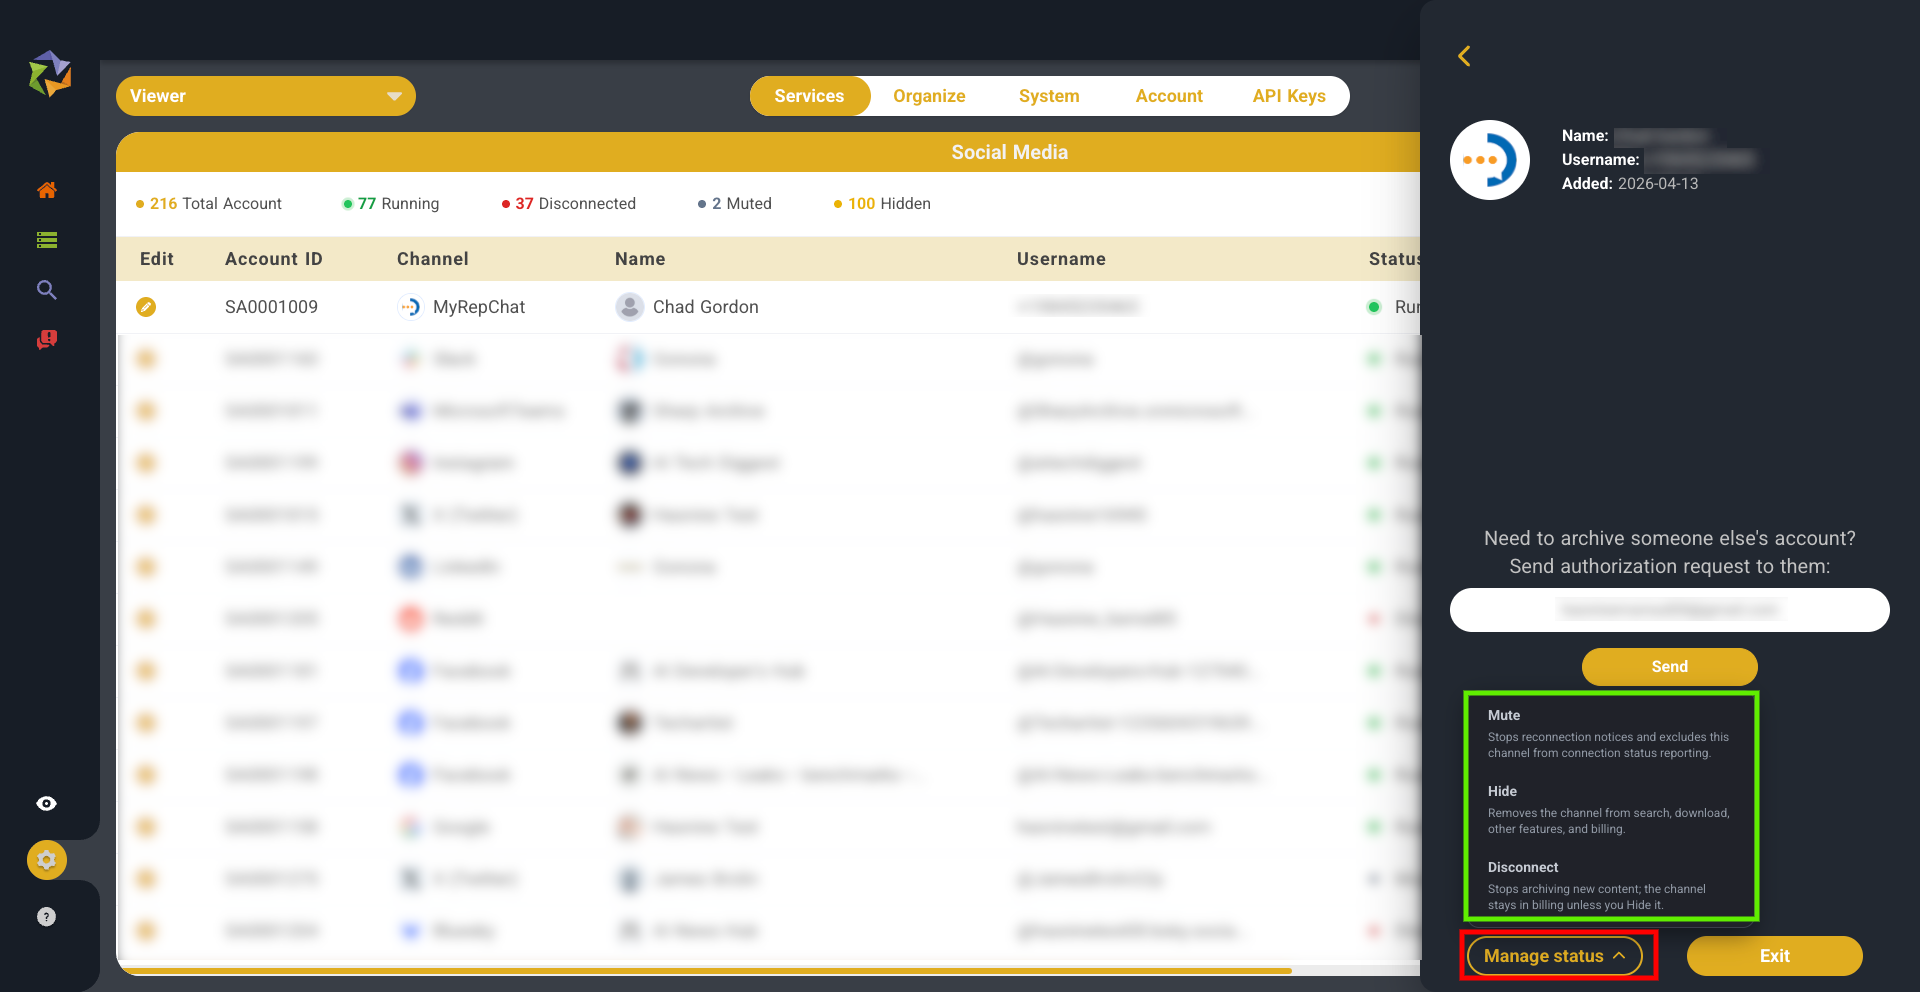
Open Settings and find your MyRepChat account
- In Sharp Archive, click the Settings (gear) icon in the left-side menu.
- In the list of accounts, find the row where the Channel column says MyRepChat. You can also type the name into the Search box to find it faster.
Click the Edit icon
- Click the yellow pencil (Edit) icon at the start of the MyRepChat row.
Open Manage status
- A panel opens on the right side of the screen showing your account details.
- Click Manage status at the bottom of the panel to see the three options: Mute, Hide, and Disconnect.
Give a reason and confirm
- Choose the option you need (Mute, Hide, or Disconnect).
- Enter a short reason for the change when asked.
- Select Mute, Hide, or Disconnect again to confirm.
Which option should I choose?
NOTE: Disconnect alone does not remove the channel from billing. To stop being charged for the channel, choose Hide.
Keep your keys safe
- Treat your Secret Key like a password. Never share it by email or chat.
- If you think a key has been exposed, delete it in MyRepChat (Settings > API Access > trash icon) and create a new one.
Note: Adding a new channel may increase your monthly Sharp Archive cost. Check Billing if you are unsure.
Still need help? Contact the Sharp Archive support team and we'll be happy to assist.