
 How can we help you today?
Archive Zoom Team Chat, meetings, notes, phone recordings and voicemails in Sharp Archive for compliance, search and eDiscovery. This guide explains how to connect your Zoom account to Sharp Archive, view archived records, and manage or disconnect the integration.
1. What gets archived
Once connected, Sharp Archive captures and indexes the following content from your Zoom environment:
2. Prerequisites
Before connecting Zoom, ensure you have the following requirements ready:
- An active Sharp Archive account with permission to add channels (Admin or a role allowed to manage channels).
- A Zoom account (Pro, Business, Business Plus or Enterprise). Free accounts can connect, but cloud recordings are only available on paid plans.
- Cloud recording enabled in Zoom if you want meetings archived. Local recordings saved to a computer cannot be archived.
- A Zoom Phone license if you want phone recordings and voicemails archived.
- If your Zoom admin restricts Marketplace apps, ask them to pre-approve Sharp Archive in the Zoom App Marketplace.
- A supported browser (latest Chrome, Edge, Firefox or Safari) with pop-ups allowed for
app.sharparchive.com.
3. Adding the app
3.1 Connect Zoom to Sharp Archive
Open Add More Channels
- Sign in to Sharp Archive at
app.sharparchive.comand click Add More Channels in the top-right corner.

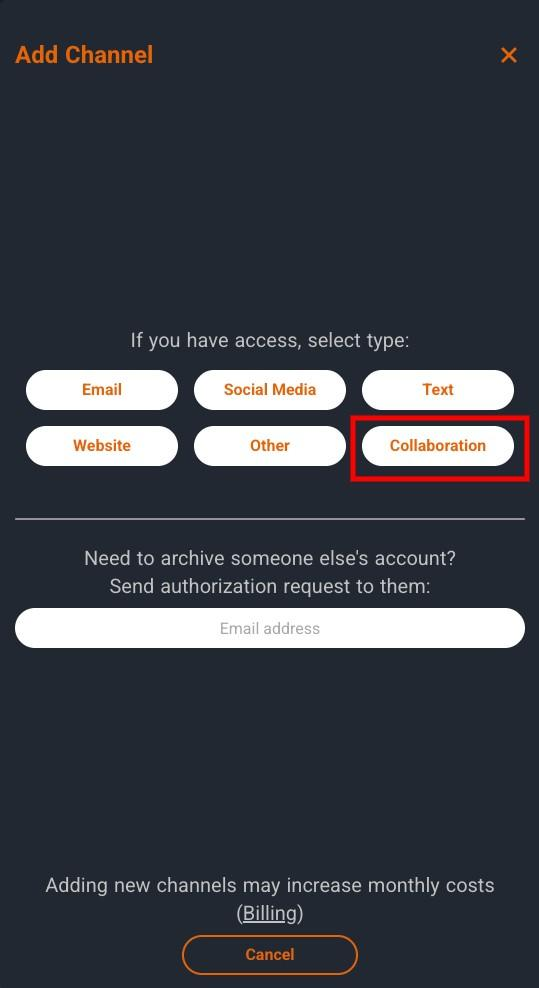
Select Collaboration
- In the Add Channel panel, under If you have access, select type, click Collaboration.
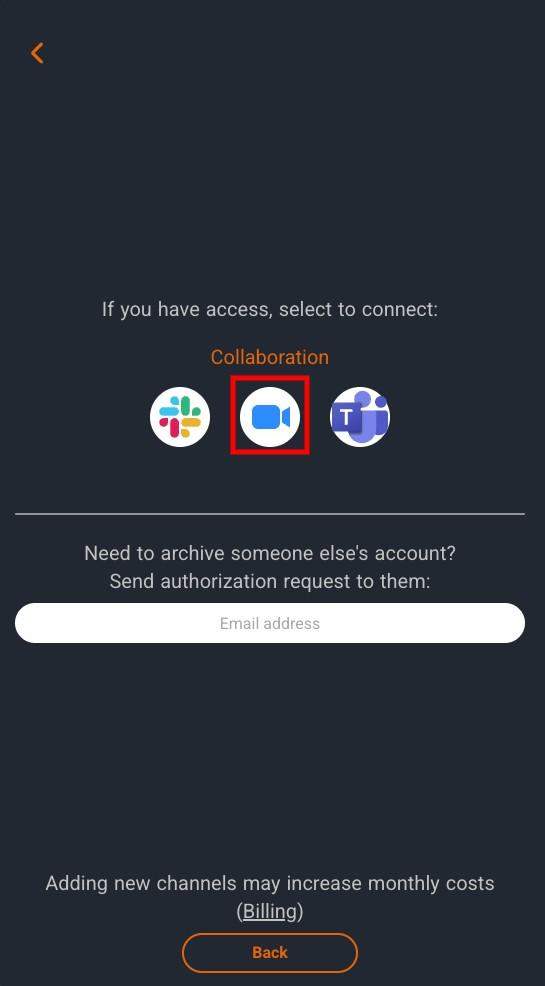
Choose Zoom
- Click the Zoom icon (blue camera). Hover over an icon to see its name.
Redirect to Zoom
- You are redirected to Zoom to sign in and authorize the app (see section 3.2 below).
3.2 Authorize on Zoom
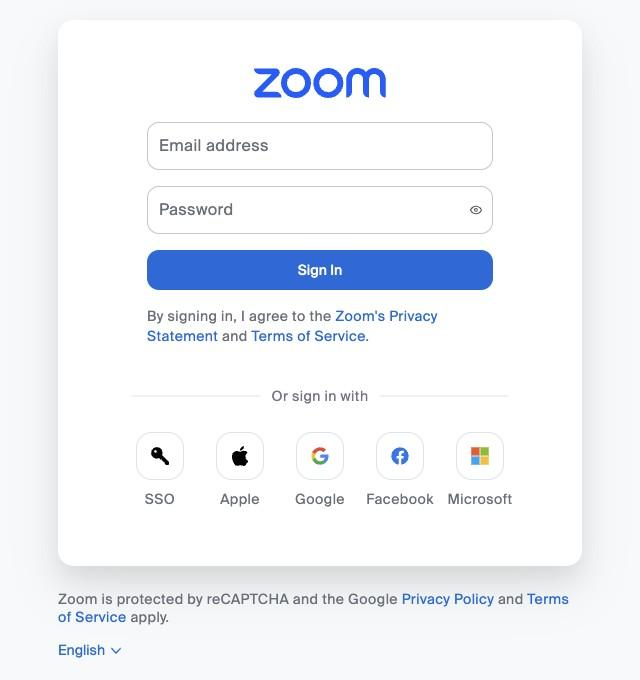
- On the Zoom sign-in page, enter the email address of the Zoom account you want to archive and click Sign In, or use SSO, Apple, Google, Facebook or Microsoft under Or sign in with.
- Zoom displays the Sharp Archive authorization page listing the information the app will be able to read (user profile, Team Chat messages and channels, meeting and cloud recording data, notes, and Zoom Phone recordings/voicemails).
- Review the permissions and click Allow. Zoom then returns you to Sharp Archive.
- After you approve, Sharp Archive shows “Connecting your account… We’ll be ready in just a moment.”
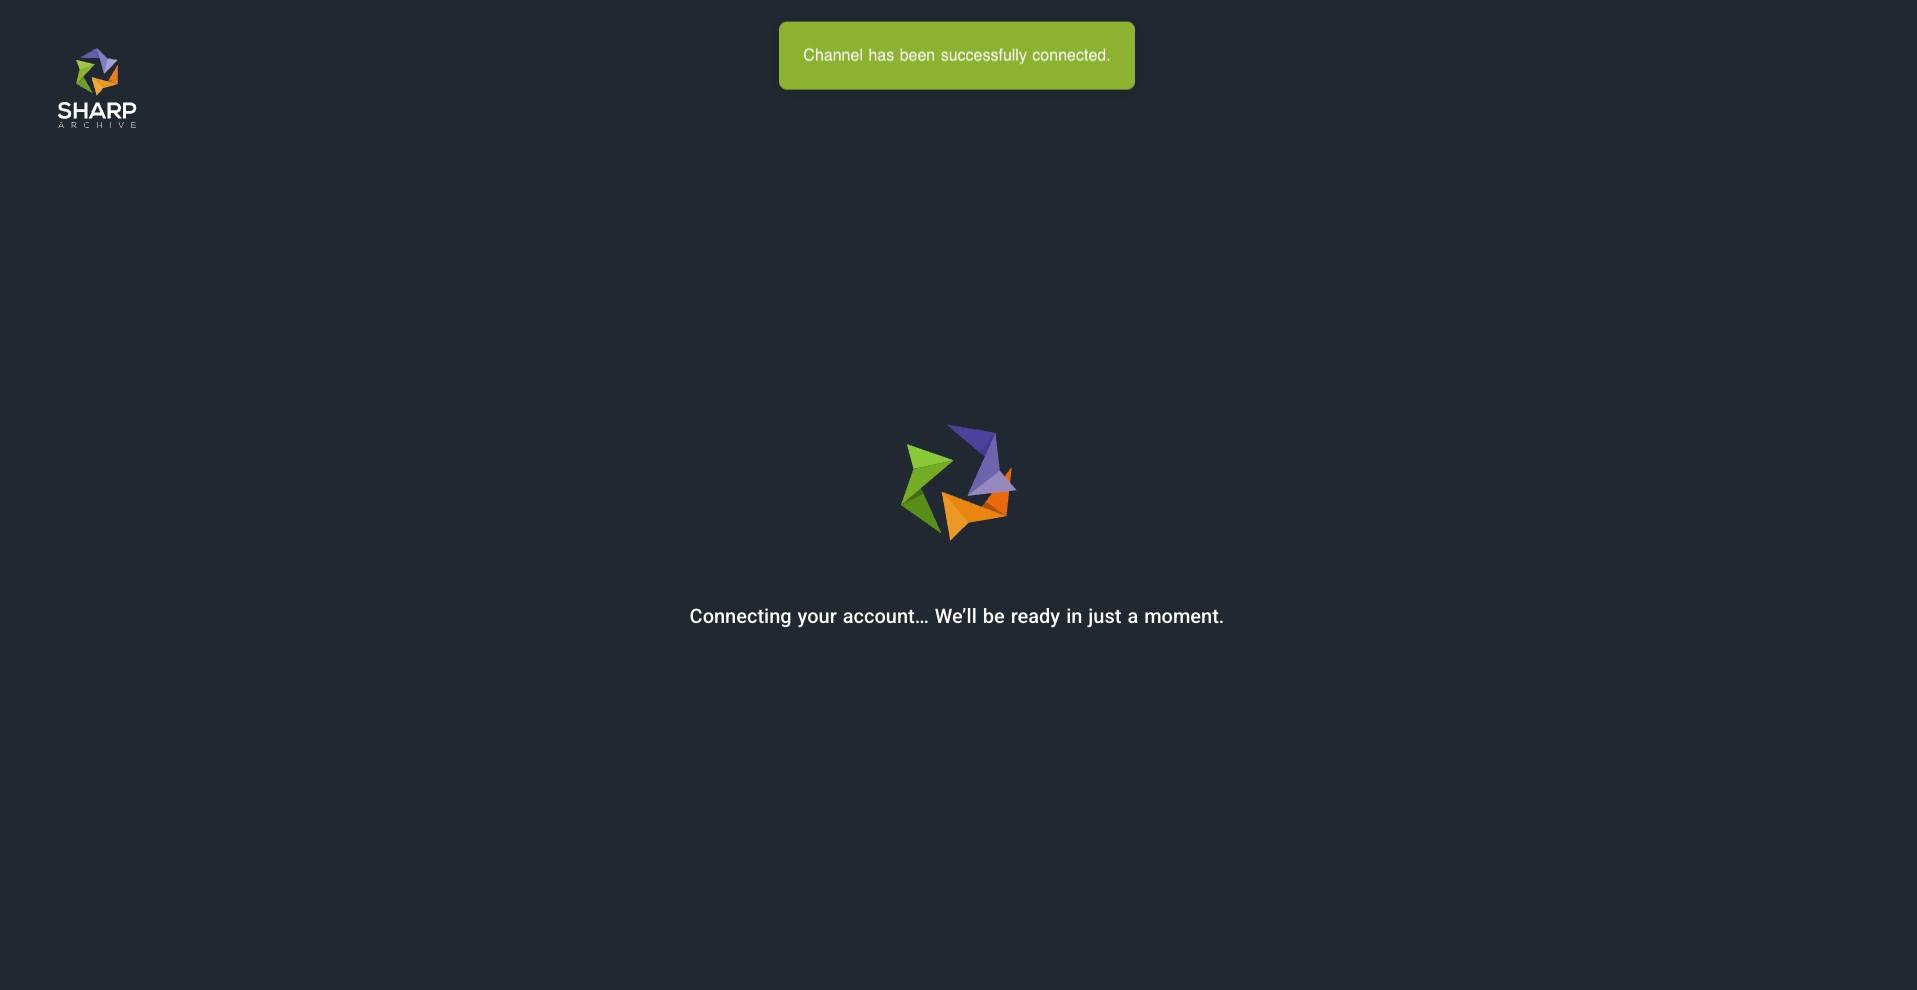
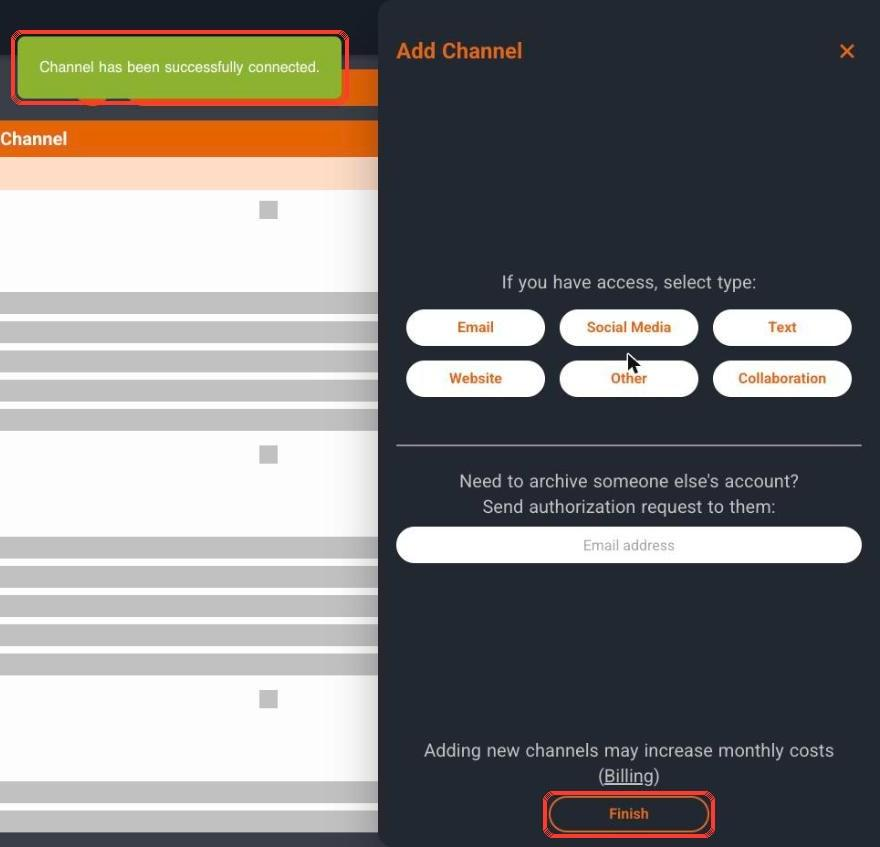
- You are returned to Sharp Archive with the message “Channel has been successfully connected.” Click Finish to close the panel, or pick another channel type to connect more accounts.
3.3 Connect someone else’s Zoom account
To archive an account you don’t have login access to (for example, an advisor or employee):
- Open Add More Channels.
- Under Need to archive someone else’s account? Send authorization request to them, enter the person’s email address and send the request.
- The recipient opens the email, clicks the link, selects Zoom and completes the authorization with their own Zoom login. The account then appears in your workspace.
When the first sync finishes, historical content available through Zoom’s APIs is imported and new content is archived continuously.
4. Using the app
4.1 View archived Zoom data
- Go to Home. In Recent Channels (right side), click the Zoom account name. You can also use Archive and filter by Zoom, or Search to find content across all channels.
- Use the left-hand tabs to switch content types: Chat, Meetings, Notes, Phone recordings and Voicemails. In Chat, switch between Channels, Messages and Shared spaces.
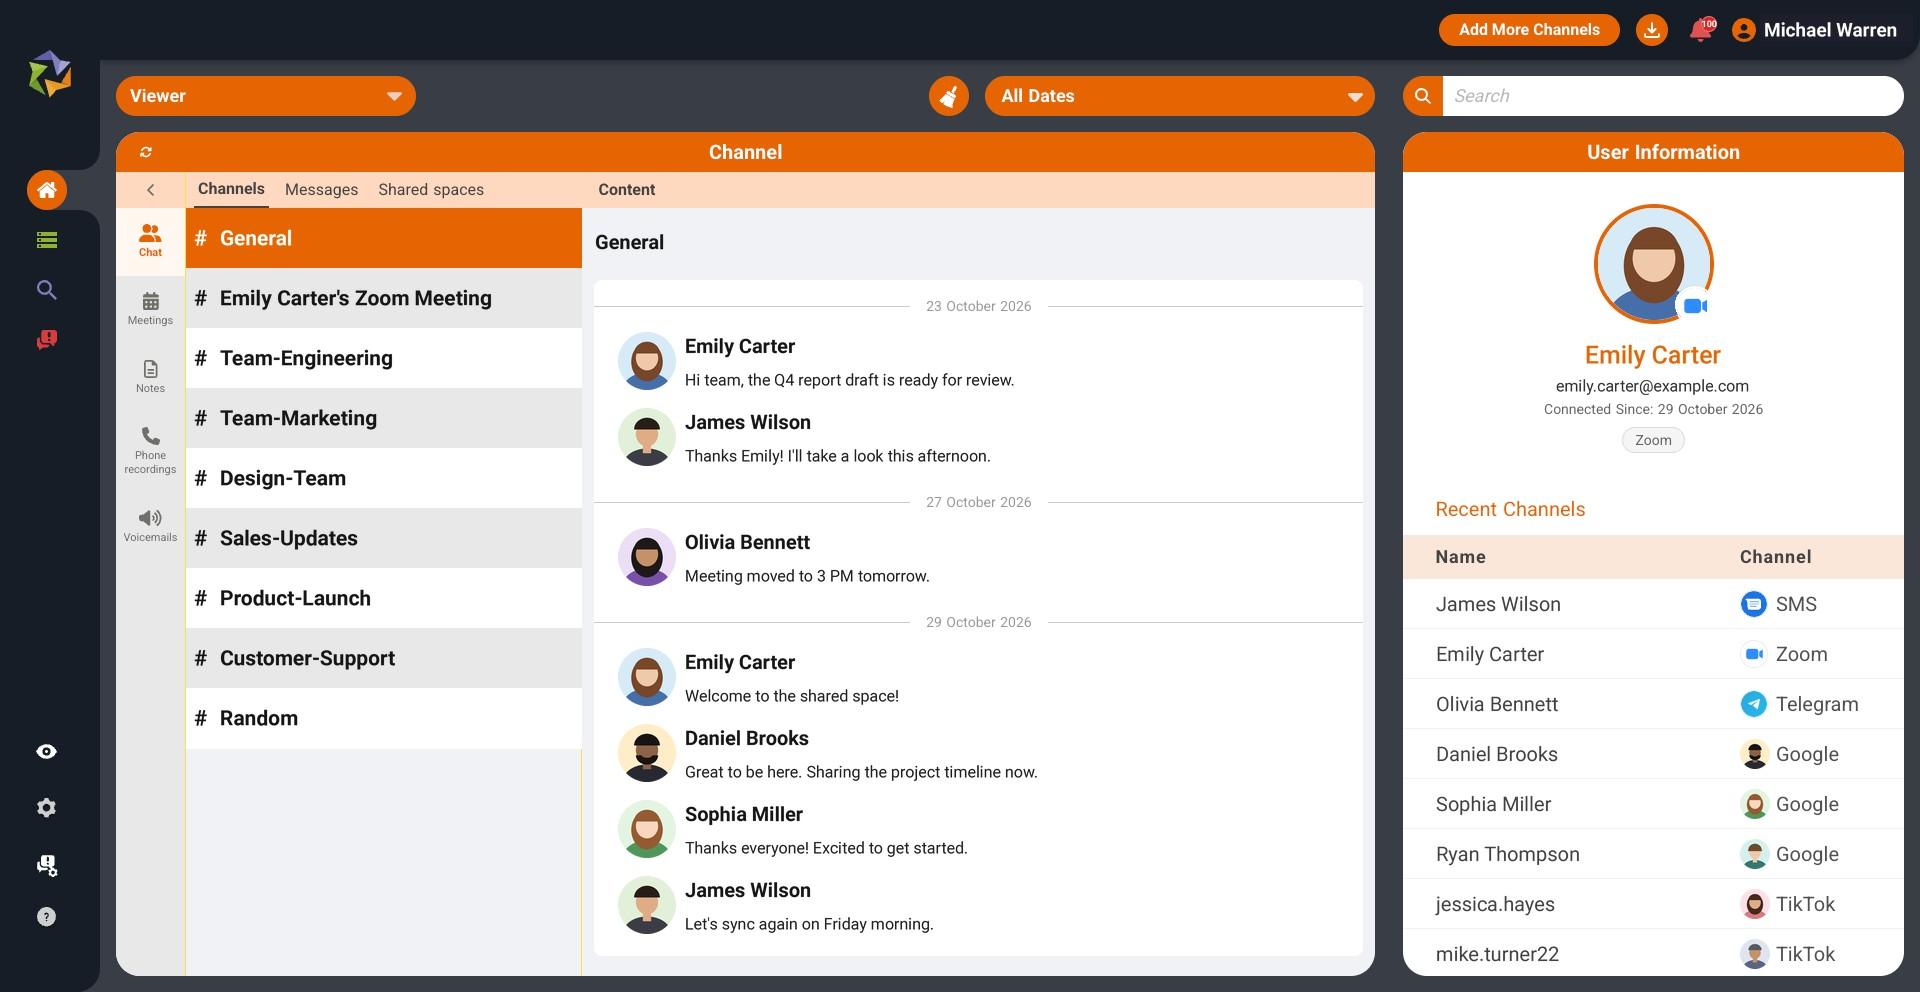
- Use the All Dates filter to narrow the time range, the Search box to find keywords, and the download icon or Bulk Download on the Archive page to export records (CSV and original files).
4.2 Check the account status
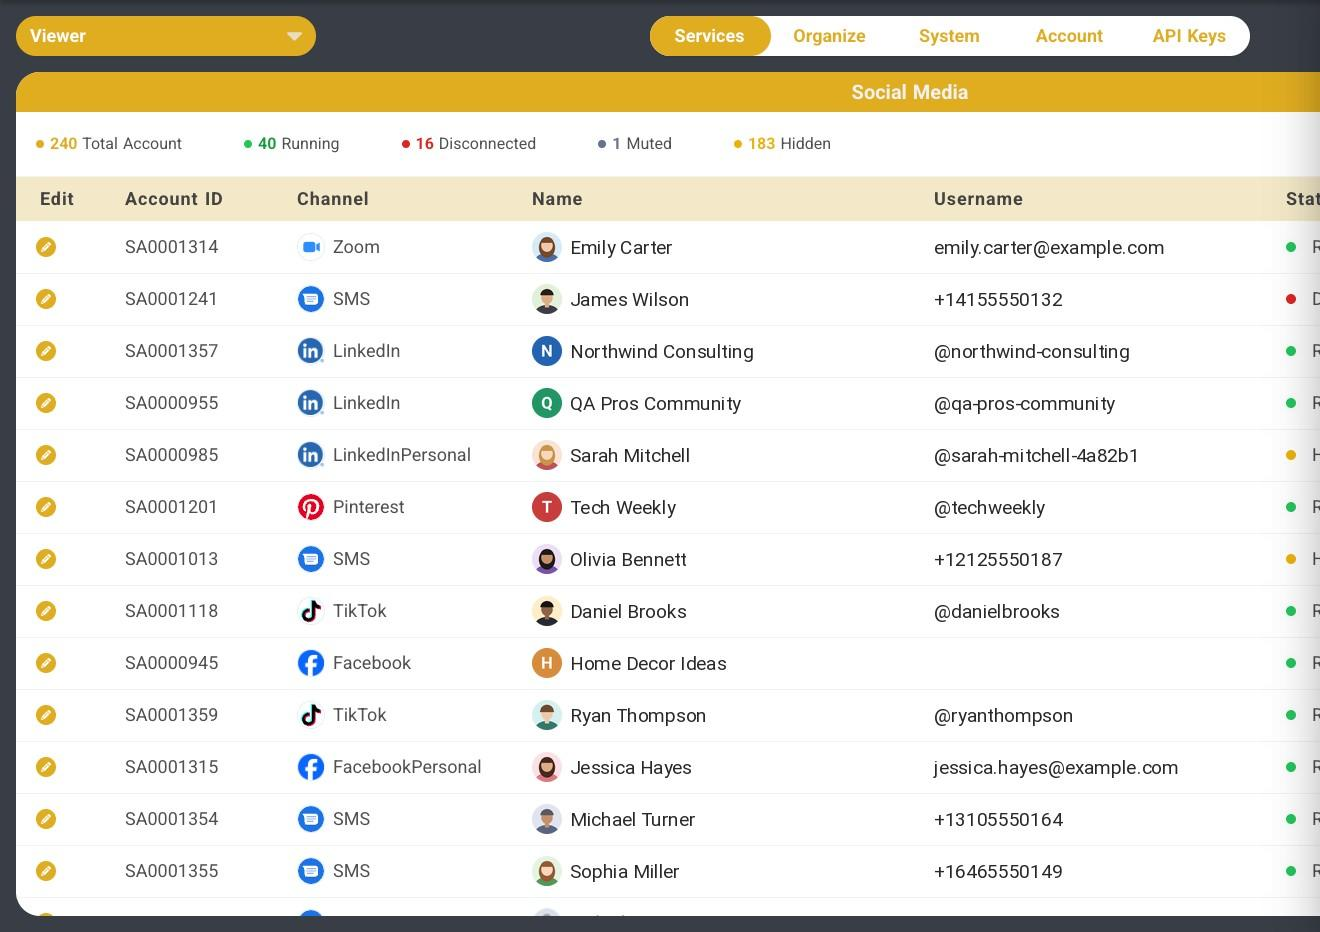
Go to Settings › Services. Each connected account is listed with its Account ID, channel, name, username and status. The counters at the top show totals for each status.
5. Mute, Hide and Disconnect
All three options are in the same place:
- Go to Settings › Services and find the Zoom account (use the Search box if needed).
- Click the Edit (pencil) icon on that row. The account details panel opens.
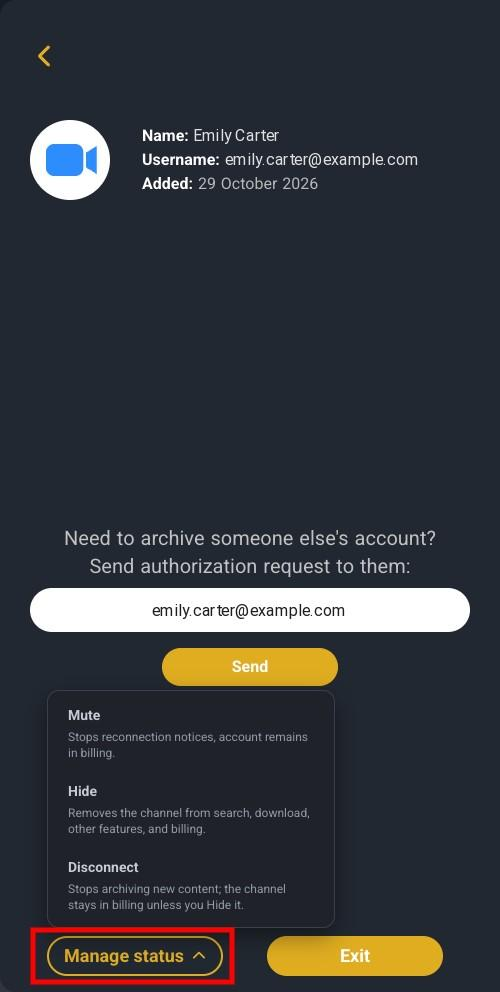
- Click Manage status and choose Mute, Hide or Disconnect. Confirm if prompted, then click Exit.
5.1 Mute
Stops reconnection notices for the account. The account stays in billing and nothing else changes. Use this when you know an account is disconnected (for example, an employee on leave) and don’t want reminder alerts.
5.2 Disconnect
Stops archiving new Zoom content for the account. All content archived up to that point remains available for review, search and export. The channel remains in billing unless you also Hide it. To resume archiving, click the ↻ reconnect icon in the Status column, or connect Zoom again from Add More Channels.
5.3 Hide
Removes the channel from search, downloads, other features and billing. Use this for accounts you no longer need to archive (for example, a departed employee whose records no longer need active review). Hidden accounts can be restored with the ↻ icon in the Status column.
6. Removing the app
To fully remove the integration, disconnect it in Sharp Archive and remove the app from Zoom.
6.1 Step 1 – Disconnect in Sharp Archive
- Go to Settings › Services and click Edit on the Zoom account.
- Click Manage status › Disconnect. To also stop billing and remove it from search and downloads, choose Hide.
6.2 Step 2 – Remove Sharp Archive from Zoom (deauthorize)
- Sign in to the Zoom App Marketplace at
marketplace.zoom.us. - Open your installed apps:
- New Marketplace view: select My library in the left menu.
- Classic view: select Manage (top right), then Added Apps.
- Find Sharp Archive and select Remove.
- Select a reason if asked, and confirm.
- Sharp Archive’s access token is revoked immediately and no new Zoom content is archived.
- The account shows as Disconnected in Settings › Services, and admins may receive a reconnection notice (Mute the account to stop these).
- Content archived before removal stays in Sharp Archive under your retention policy so your compliance records remain intact.
- Nothing in your Zoom account is changed or deleted. Your chats, meetings and recordings stay in Zoom.
- If you are an account admin and remove the app for the whole account, archiving stops for every user connected through that account.